Managing Docker Containers
This document assumes that you have installed Docker Desktop and that you have access to Harbor
Creating Containers
For the most part, you will only occassionally use the Docker Desktop app directly. You will use it to initially set resource requirements, and, to stop, start, and delete containers. That's about it.
You can have multiple containers running simeltaneously as long as your laptop can handle the resource requirements.
Setting Resource Requirements
When you first start using Docker Desktop, it's a good idea to set resource usage limitation to make sure that Docker Desktop has the RAM and CPU necessary to create our containers.
A good minimum is:
- 10 CPUs
- 16 GB RAM
- 3 GB Swap (you'll also need around 1 GB of free disk space)
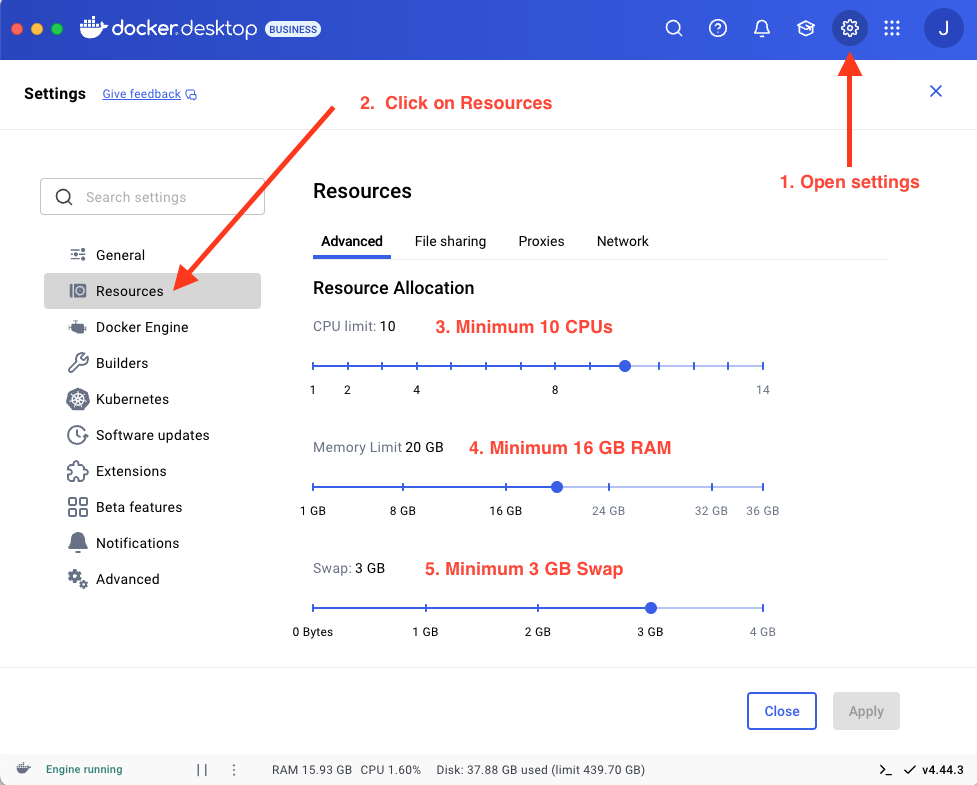 Setting Resource Usage In Docker Desktop
Creating Your Container
You'll want the nextjs-docker.sh script installed on your laptop. This shell script ,mostly automates the creation of your container. Go to the Self-Service+ app (MacOS) (or BigFix on Windows) and search for nextjs-docker.
Once the nextjs-docker.sh script is installed, you can use a sample script like the one below. It assumes that Schwab Self Service put the nextjs-docker.sh file into your ~/bin directory (MacOS). On Windows, the script should be in your home directory.
#!/bin/bash
set -e

USERNAME="jason.levitt"
PASSWORD="abababababab"
EMAIL="jason.levitt@schwab.com"
GITHUB_TOKEN="ghp_5lakjsdhfalskdjhfalsdkjh"
JIRA_TOKEN="MTaslkjahsdfkasdljhfak"
JIRA_PREFIX="CMS"
PROXY="Z"

/Users/$USERNAME/bin/nextjs-docker.sh \
  u="$USERNAME" \
  p="$PASSWORD" \
  e="$EMAIL" \
  g="$GITHUB_TOKEN" \
  j="$JIRA_TOKEN" \
  jp="$JIRA_PREFIX" \
  pr="$PROXY"
The script will still prompt your for four things:
- Name of your container (your containers must have unique names)
- Version
- Branch
- Depth of pull
You'll always need to specify a name (I like using the date e.g. OCT-2-2025). For the other three questions, you can just accept the defaults unless you're doing something special. If your container build fails, you might need to use 100 for the "Depth of pull" question.
Once the container creation finishes, you should see the container in Docker Desktop with the name you gave it.
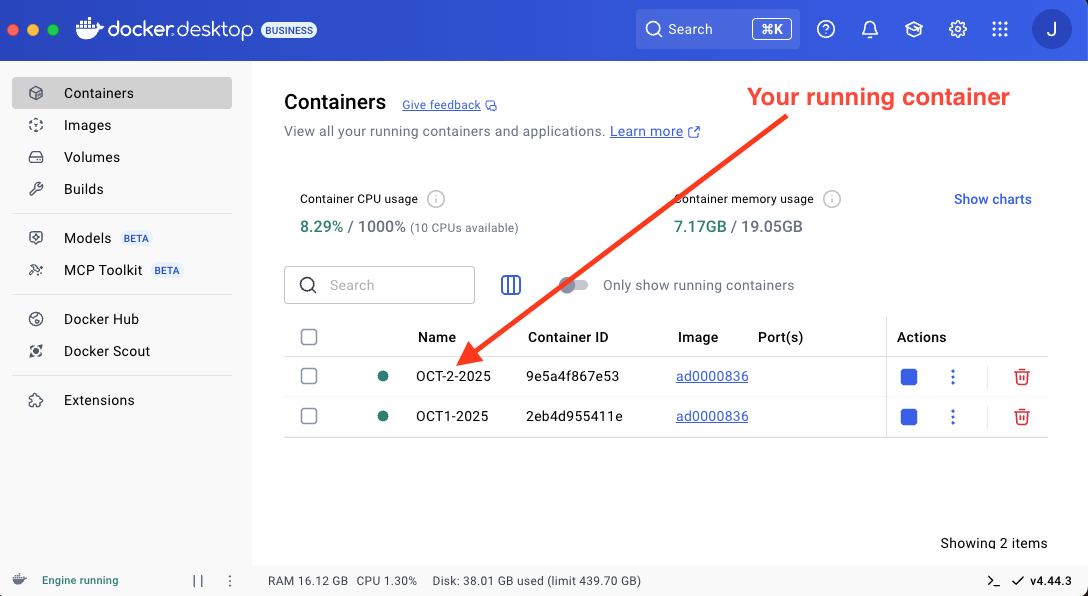 Your Running Container In Docker Desktop
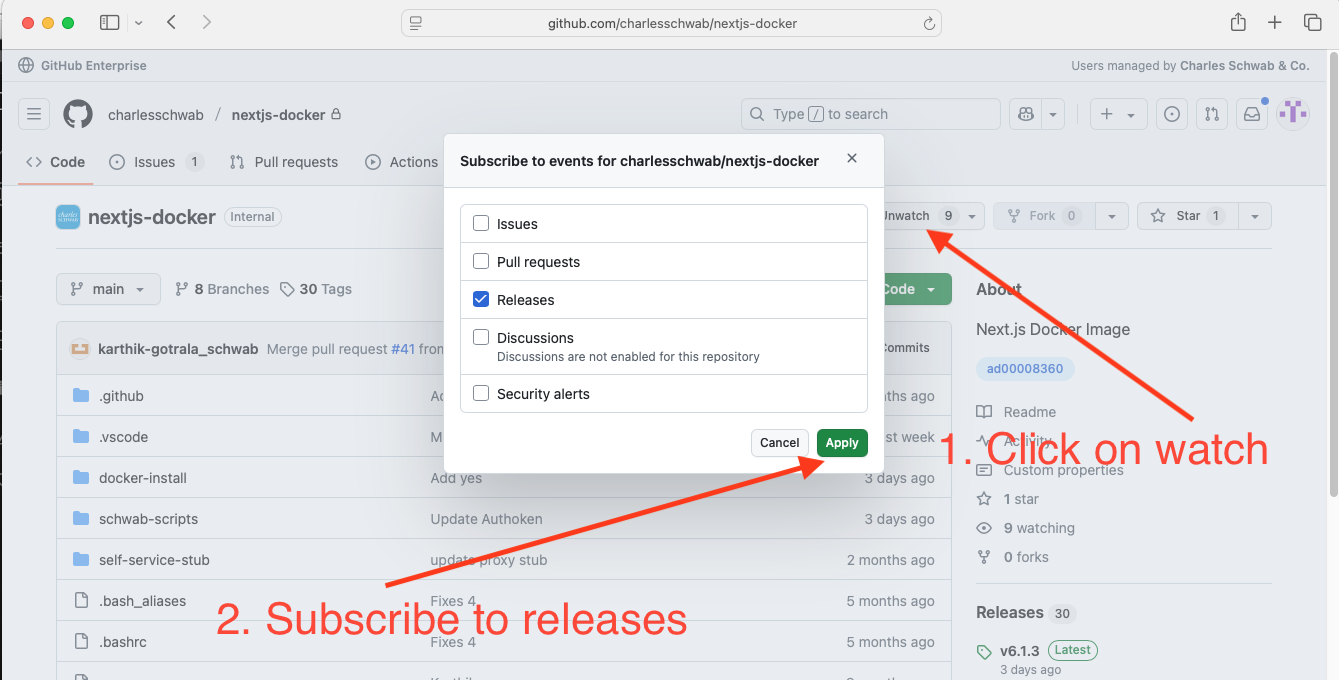
Get informed when new versions of the Docker container are released. Go to the nextjs-docker repo on GitHub and subscribe to updates
Using Your Container In VS Code
Once you've created your new container, you'll want to add it to a VS Code window so that you can start developing.
Follow the instructions in the Attaching A Container in VS Code section to get your container attached to a VS Code window.